As 2018 was coming to a close, I thought back on the exploring that I had done throughout that year and came to a conclusion. While I had done a lot of cool stuff, I had also done entirely too much driving to get there.
I live in a location with an abundance of outdoor recreational opportunities, and that is a huge part of why I live here. I decided to come up with a project for 2019 that would underscore that quality of my chosen home, and at the same time make my recreational choices a bit more environmentally friendly. So I laid out a set of rules:
At some point during each month throughout 2019, I would find my way from my front door to a named mountain summit without using a motor of any kind.
Each of the 12 summits must be different.
Any mode of self-powered transportation would be on the table – hiking, running, snowshoeing, skiing, cycling, anything that did not involve a gas or electric motor.
To make the challenge a little bit more interesting and encourage me to get out of my comfort zone a bit, each summit would have to be one that I had not reached without motorized transport prior to 2019. This ruled out 4 or 5 summits that are very close to home.
The idea of spreading them out, one per month, would ensure that I would see a variety of conditions and modes of transportation.
Now 2019 has come to a close, and the project is complete, which means it’s time to run some numbers! These are the totals for the 12 activities that comprised this project.
Miles traveled:
Cycling – 309.77 miles
Skiing – 36.46 miles
Foot travel – 97.17 miles
Total – 443.4 miles
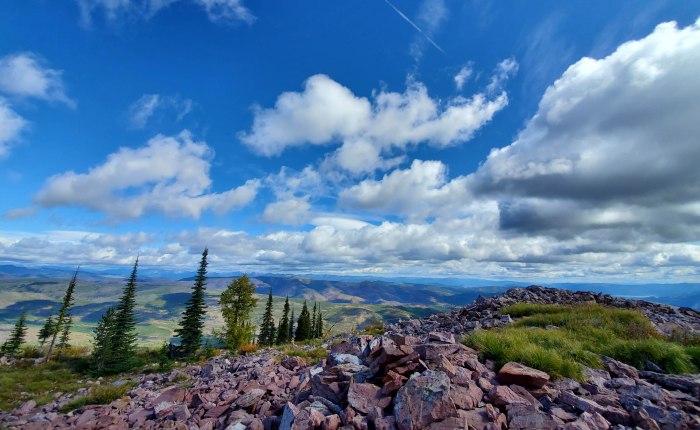
The view from Mineral Peak
Vertical feet climbed:
Cycling – 24,326 feet
Skiing – 12,209 feet
Running/Hiking – 26,063 feet
Total – 62,598 feet
A cold, snowy October day on Bonner Mountain
Moving time:
Cycling – 26 hours, 57 minutes, 29 seconds
Skiing – 11:05:22
Running/Hiking – 24:16:57
Total – 62 hours, 19 minutes, 48 seconds
An uncharacteristically mild December on Blue Mountain
The summits:
January – Woody Mountain (bike-ski)
February – Stuart Peak (bike-ski)
March – Miller Peak (bike-hike)
April – Point Six (bike-ski)
May – Sheep Mountain (bike-run)
June – Mosquito Peak (bike-run)
July – Lolo Peak (bike-run)
August – Iris Point (bike)
September – Mineral Peak (bike)
October – Bonner Mountain (bike-hike)
November – Mitten Mountain (run)
December – Blue Mountain (bike-run)
All smiles on a June group run to Mosquito Peak
The map:
Miscellaneous stats:
Adventure buddies – 10
Bikes used – 3 (Orbea Terra, Cannondale Scalpel, Fixed-gear frankenbike)
Running shoes used – 4 (Saucony Peregrine, Hoka One One Torrent, Salomon Sense Ride, Saucony Razor Ice)
Pairs of skis used – 1 (Atomic Backland UL65)
Times I wished I brought snowshoes – 3
Times I brought snowshoes – 0
Lookout towers climbed – 2
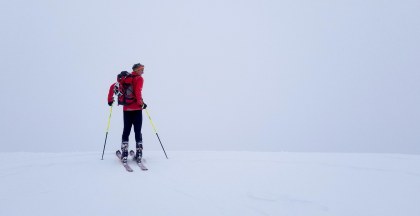
A February whiteout on the Stuart Peak summit
Wishing everyone happy adventures in 2020! If you have the chance, I encourage you all to take some opportunities to make them self-powered!
There are times when this question makes sense, and there are times when the absurdity of it makes you giggle, because it is 1:00 in the morning, you’re several miles from the nearest sign of humanity, and it’s only just out of the realm of plausibility that the wolves you heard howling minutes before are firing up a griddle and whipping out a batch of delicious breakfast treats. Nevertheless, that was the situation we found ourselves in, this trio of first-time 100-mile runners who, after a wild combination of highs and lows spread out over the last 80 miles, ended up running in tandem through the darkest, loneliest part of the night. The story of the IMTUF 100, as is the story of any race that starts at 6am and doesn’t finish until the next day, is one of absurdity. It’s not without its share of inspiration, excitement, new friendships, teamwork, and, in some cases, intense competition, but the common thread that ties it all together is that the task at hand is a completely ridiculous one. Between whoops of joy, groans of disappointment, and the occasional olfactory hallucination, we are all there to accomplish one thing: get back to where we started.
Home base for the Idaho Mountain Trail Ultra Festival (IMTUF) is Burgdorf Hot Springs, nestled within the Payette National Forest, just under and hour drive north of McCall, Idaho. The cabins are simple and rustic, with no electricity or running water. There are wood stoves for heat and whatever you bring for light. There were 12 of us (five racers and seven crew members) who came down from Missoula and stayed in “The Castle”, a large cabin up on a hill, overlooking the whole race weekend scene. After getting settled in, eating a collaborative dinner, and making sure all our race gear was in order, morale seemed to be high among the ranks on Friday night. I slept intermittently, a little giddy about what was awaiting on Saturday morning.
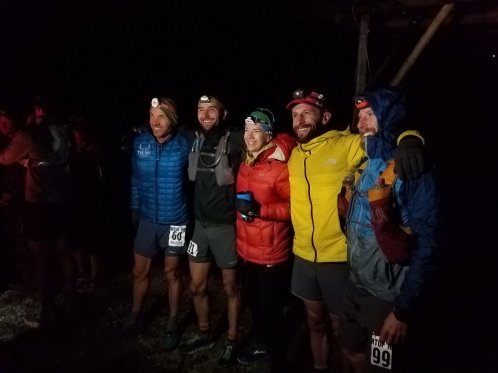
Missoula crew before the start. From left: John Fiore, Jesse Carnes, Sara Boughner, Nate Bender, Alex LeVan. Photo credit: Kailee Carnes
Just as with every race morning, Saturday morning snuck up on me. Of course I knew I had prepared and was ready to run the race; I just wasn’t ready to start the race. But 6:00 always arrives, whether you want it to or not, and there we were, standing on the starting line, spending a minute or two excitedly cracking jokes about what we were about to do.
“Just remember, go out hard to establish a good position.”
“The key is, don’t ever stop at aid stations.”
“It’s just a 5k with a 100-mile cool down. Over mountains.”
And just like that, at the sound of the elk bugle, we were off, headed down the two-mile stretch of dirt road leading to the trails that would be our home for the next 19 to 36 hours.
Part 2: Settling In
IMTUF alternates directions every year, and this year was a clockwise year. In terms of course dynamic, that meant we would be encountering the easiest part of the course at the beginning, and getting into the more mountainous sections later. As a result, it took a good bit of restraint not to start out too fast on the smooth, rolling singletrack that comprised the first 25 miles. I found a group that seemed to be going a very sustainable pace and resolved to stay in the group until at least the first crew access point at mile 17. As it happened, fellow Missoulians John and Nate ended up finding their way into that group as well. It was comfortable, everyone was chatting good-naturedly, and I was happy to be out for a nice jog through the woods with a great group of people as the sun came up. I rolled into the mile 17 aid station feeling like I had run about 2 miles and spent about a minute and a half with my very excited crew of Kailee, Bill, and Nico. This was the first of many times I would see my crew’s smiling faces and feel the energy that comes along with it. In fact, it’s worth noting that essentially the whole race was broken into chunks based on when I would have contact with my crew. Their energy and excitement egged me on over and over, and gave me something to look forward to when it got a whole lot harder to keep moving. After refilling my two chest bottles, which I had emptied, stuffing my face with pickles, fig newtons, and swedish fish, and getting the all-important high-fives, I headed back out onto the course.
With the sun now beaming down on the trail, it became immediately obvious that I had forgotten to drop not only my headlamp, but also my wind shell at the aid station. That’s what I get for going through quickly, I suppose. I packed both items into my vest and carried on. The majority of the group I had been running with had spent more time at the aid station, and as a result I ended up much further up in the field than I had intended at this point. I tried hard to concentrate on my own pace, conserving energy and moving efficiently, and I continued to move up through the field from miles 17 through 30. We climbed up and over Diamond Ridge, which was the first major climb on the course, and as I descended to the second crew access point at mile 33, I found myself gaining ground on a group of three runners in front of me.
Comin’ in hot at Upper Payette Lake, mile 33. Photo credit: Kailee Carnes
Once again, I went through the aid station fairly quickly, spending about 2 minutes this time, and left with the group. As I left the aid station, Nico reminded me, somewhat sternly after I had passed so many runners in the previous section, to go slow for the next 25 miles or so. This was the advice I would have to keep repeating to myself over and over, getting carried away for small stretches when I felt good, then repeating Nico’s words in my head: “go really slow.”
Part 3: Meandering
Starting slow is one thing, it seems, but maintaining a sustainable pace for 40 or 50 miles becomes more difficult. There’s enough time for the mind to wander, and having been out there for 8-10 hours already, I found myself getting caught in a trap of picking up the pace just because I was excited to feel good that far in. In reality, I was less than halfway done, and keeping things in check was still of the utmost importance. Eventually, I was able to settle in with a couple other runners on the way up to Duck Lake, and forcing myself to stay with them when I occasionally wanted to speed up helped keep the pace controlled.
As we meandered through the middle miles, I became aware that the runners around me were in a very wide array of different states, some clearly feeling confident and moving fast, and some already feeling the effects of hours of trudging through the mountains. The next milestone, at mile 49, was where many of us would pick up our first pacers, and was also a potential turning point where things could start to to well or take a downward turn very quickly. When I reached that point, I was running in 6th place and, from the looks of it, feeling better than many of my fellow racers. My crew was there with as much energy as the first two times I saw them, and by this time my dad had arrived and added more excitement to the mix. Kailee was ready to go; she would run with me for the next 11 miles. It was amazing to have her company, and I was fairly chatty as we climbed past Snowslide Lake and over the most beautiful section of the course. I felt strong on the climb, moving efficiently and conserving the necessary amount of energy.
About to pick up Kailee for an 11-mile pacing stint at mile 49. Photo credit: Kailee CarnesApproaching Snowslide Lake, mile 50. Photo credit: Kailee Carnes
What came next, though, was my first wave of self-doubt during the race. We had a long, gradual 9-mile descent to the next aid station, at mile 60. Where I had hoped to be able to stride out a little and make good time, I found my legs a bit uncooperative. I was still able to run, but gone was the smooth, efficient feel that had been present on the climb. A brief rain shower necessitated a stop to put on a jacket, and a couple bathroom stops zapped momentum a little further. Still, by the time I entered the next aid station, crew waiting anxiously, I was in 5th place and 15 minutes ahead of my projected time. I took 13 minutes to gather my gear for the night, eat some food, and mentally prepare for the long slog ahead.
Part 4: Charging Into the Night
What lay ahead was a 30-mile stretch with no pacer and no crew access, during which the sun would set and I would traverse the most remote sections of the course. As I pushed onward, the energy difference between the climbs and descents became more pronounced. Around mile 65, my quads started to throw a bit of a fit, and descending got exponentially more difficult. I still felt that, as long as the terrain was steep and everyone was walking, I could climb well, but the flats and downhills ruined any momentum I could find. Just after sunset, two guys passed me in the dark, and as much as I tried to hang on with them and use their energy, I just didn’t have the gusto to make it happen. I trudged on through the night, suspecting I might end up walking the rest of the way to the finish. I had tried not to dread this section too much, but it was intimidating, and it appeared that any fears I had about it were coming to fruition.
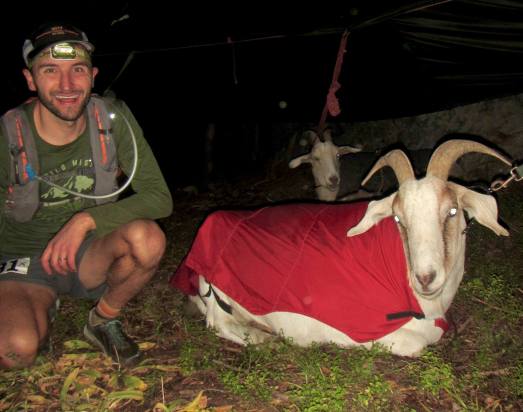
And then, out of nowhere, with no impetus whatsoever, everything changed. Part of the way down a rocky, technical descent, I felt my legs start to move smoothly again. I noticed that, in the distance ahead of me, I could see the occasional hint of a light from other runners’ headlamps: the two guys who had previously flown by me like I was standing still. Before I knew it, I was headed into the Box Creek aid station at mile 75, and I had company. Jeff and Heath, the two guys who had passed me, had recently arrived at the aid station and were chatting with the volunteers and hanging out with the goats who packed the aid in.
Thanks for the aid, Ernie! Photo credit: Irene Saphra
We all headed out together, and just as we were leaving I spotted a couple Missoula friends, Nate and his pacer Josh. They had been quietly gaining on all of us for a while, and now that they were in striking distance, I knew Nate would be giving whatever he had to make sure he chased us down before the finish.
In the next 15 miles, the highs and lows came and went quickly, but the three of us stuck together for the most part. We discussed running on treadmills, pizza as a trail snack, and how the occasional magical fart or burp could yield a fleeting burst of what seemed like superhuman speed at the time. Jeff smelled the aforementioned mysterious forest pancakes. We employed generous walk breaks while running down a dirt road at a 4% grade, because at this point, it was about us all getting to the finish in one piece. Nate and Josh eventually did catch us, and by the time we reached the next crew access point at mile 90, we had a bonafide pack running together at 1:30 in the morning. It was the most surreal and, in a very strange way, perhaps the most pleasant part of the race.
The aid station at mile 90 was a turning point for me, and not in a good way. I sat down by the fire and ate some soup, and I got a little too comfortable. I watched as Heath left, then Jeff, then Nate. My pacer for the last section, Micah, waited anxiously until I got up and got my vest back on, at which point I promptly headed to the side of the trail and threw up all the soup I ate. We took off slowly. At points with good visibility, I could see Nate ahead, but with each laboured step, he moved further away. We had one final 2,500-foot climb before plummeting to the finish line. In most situations, it would be considered a runnable climb, but there was very little running on this particular night. As we crested the top, the night was dark and the stars were among the brightest I have ever seen.
Part 5: Icing on the Cake
One descent to the finish. That was all we had left. According to my watch, I had already run over 100 miles. In a sense, what I had come out to accomplish was done. Sure, I hadn’t crossed the finish line, but I had run all through the day and all through the night. I had found camaraderie in the middle miles. I had felt the excitement of a good team working together at the aid stations to get me properly geared up, fed, hydrated, and back on the trail. The rest was all just bonus mileage. I bombed the descent at breakneck speed, and by that I mean 13 minutes per mile with frequent walk breaks, and occasionally muttering, “ow, ow, ow” beneath my breath. My knees and ankles felt like they might snap, but somehow the muscles in my legs were still managing to hold me up. 4 miles to go…3 miles to go…2 miles to go…there’s the road!
When we hit the road, Bill was waiting to jog the rest of the way in. It was a mile and a quarter, give or take, to the finish. I knew there was no one close behind me, but I kept glancing back, afraid a headlamp would appear out of nowhere and sprint past me. I was still in walk-jog mode, making liberal use of my poles to take the weight off my aching feet. Shortly before the finish, we were joined by Kailee and my dad.
It was maybe the least fanfare I have ever seen at a finish line. I got there at 6:39am, and there was a small handful of people standing around, having just recently gotten up or having stayed up all night. Either way, it was a sleepy atmosphere. I collected my belt buckle and collapsed into a heated tent next to the finish, where the 7th place finisher, who finished about 20 minutes ahead of me, was still warming up. We tiredly talked about the race briefly, then, still in a bit of a stupor, I hobbled over to the hot springs and hopped in, without a second’s thought about how I didn’t have dry clothes for after I got out.
The only photo of the finish, to my knowledge. Photo credit: Micah Drew
Heath and Nate made their way into the hot springs as well. Between that morning’s soak session and a later one in the evening, we spent hours reflecting on all manner of things, primarily, of course, the absurdity of what we had just done.
As I write this, it has been 12 days, almost to the minute, since I crossed the finish line at IMTUF. One of the most common questions I get when discussing the race with people is whether I will do another 100-miler. I can safely say it’s not a matter of if, it’s a matter of when. For now, though, I still have the occasional aches and pains in my joints and tendons. If I twist a certain way, my hip still hurts. If I try to run more than a couple miles, my knees still whine and complain. The floppy toenail on my right foot is long gone, and the tender spots on my feet are mostly healed. Eventually, all these things will pass, and it will be time to plan for the next conquest.
Let me start by saying, like many people who enjoy rambling around in the woods, I really like maps. Perusing over a good map gives a sense of excitement and possibility. There’s nothing quite like spreading out a map on the living room floor and plotting out possible excursions. Do you think we can traverse that ridgeline? I wonder if we can get down to that lake without getting cliffed out? That trail connects there?! No way! We can make a great loop out of that.
I got my start reading maps by reading USGS quad maps on family backpacking trips. These set a high bar for technical accuracy, but a very low bar for graphic appeal. During the summers when I was in college, I worked for the Forest Service and continued reading those same quad maps, while also occasionally using the National Forest map for the area. The difference was striking. The forest map was substantially easier to look at, but was occasionally lacking in technical accuracy or detail. These differences can be found on all sorts of maps, and they are worth paying attention to.
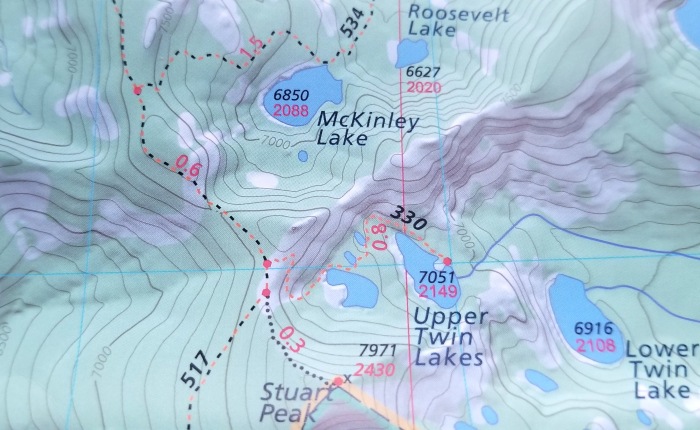
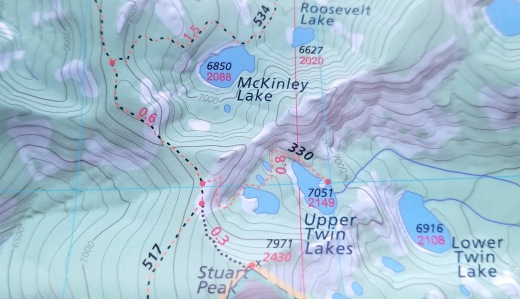
In the last few years, the maps produced by Cairn Cartographics have become by far my favorite maps to use in the state of Montana. Generally, in my product reviews, I like to point out the things I do and don’t like about the product in question, but the only negative thing I can say about the Cairn maps is that I wish there were more of them. As a result, I am just going to tell you why they are the best maps of the area.
Visual Presentation
When I compare these maps to the majority of other maps of the region, one of the first things I notice is how easy it is to interpret the landscape. A big reason for this is an effective use of shading in addition to topo lines, allowing you to not only read the slope based on density of lines, but to get an immediate overall sense of the landscape, as if you were actually looking at it from above.
Detail of a Cairn Cartographics map
In addition, it is important to note that the text is chosen very deliberately, so as not to get in the way if it’s not what you’re looking for, but to be easy to read if it is. I have used countless maps through the years that have text all over the place, which interferes with one’s ability to get the aforementioned lay of the land.
Lastly, the key is fairly intuitive. The delineation of trails for different user groups is easy to figure out, and the land ownership classifications are, for the most part, pretty clear. As you can see above, there are also different colors used for forested areas and those either above tree-line or otherwise unforested. This has proved very useful when determining whether a proposed ridge route is going to involve a lot of bushwhacking or not.
Accuracy/Detail
One might think, in this day and age of easy-to-use GPS devices, that the accuracy of maps can be taken without question. In general, it is true that most are pretty darn good, but I still run into the occasional situation where the map says there is a trail that doesn’t actually exist, or the trail goes off in a different direction, or the lake that allegedly exists is only there part of the year. Likely because of their specific focus on places that are close to their own backyard, Cairn Cartographics seems to catch most of this stuff. It is worth noting that over time, new trails, closures, and general changes in landscape will yield some inaccuracies, but at the time of production, my impression is that these maps are extremely accurate.
Materials
Printed on a tear-resistant plastic, these maps are extremely durable and waterproof. As much as I appreciate the nostalgia of a quad map folded up in a ziploc bag, with the area you need to see facing up, it sure it nice to have something you can open up in the rain without ruining it. Every map should be waterproof, but not every map is.
Also worth noting is the size of the maps. The total size is 25″ x 39″, which is fairly manageable. While I do love laying out a good 36″ x 48″ forest map in the house, those get pretty unwieldy in the backcountry.
They’re local!
Cairn maps are made by a local couple in Missoula, Amelia Hagen-Dillon and Jamie Robertson. They have been producing them since 2010 and are an integral part of the local outdoor scene. Additionally, Amelia is one of the new Runners Edge ambassadors, so watch for some of her product reviews coming out soon!
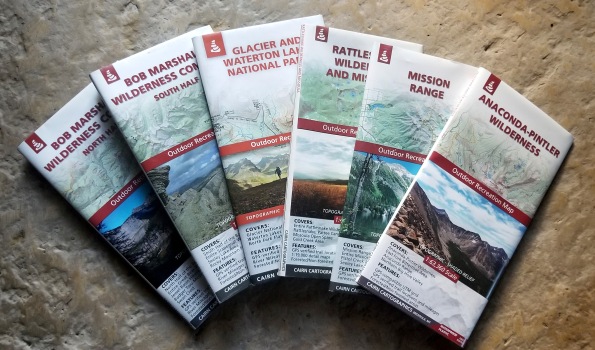
My current collection of Cairn Cartographics maps.
As I mentioned, my biggest complaint about Cairn Cartographics is that I wish there were more maps! Eventually, I would really like to see a map of the Great Burn/Stateline trail area, as well as a detailed map of the three mountain biking areas close to Missoula (Blue Mountain, Pattee Canyon, Rattlesnake). While poking around on their website, I was excited to learn that they have a Public Lands of Montana wall map, which is definitely now on my list to get when I get the chance.
Check ’em out, and start planning your next adventure!
In my experience, there are three factors that determine the overall quality of a running shirt. Each factor can be assessed, one by one, in a very specific order. I tested out the Brooks Ghost short-sleeve tee, a lightweight, warm-weather shirt, and here are my takeaways in each of those categories.
Fashion
When I initially tried the shirt on, I was struck by how loose-fitting it was. I wouldn’t say it runs large, as the overall length and the sleeves fit quite well, but it is not a tight shirt. I suspect that is intentional, since it is designed to have a light, airy feel and if it felt constrictive in any way that would likely defeat the purpose. The neck is somewhat wide, but not very deep. If I have one complaint on the general fit of this shirt, I would like to see the neck go just a bit lower in the front and be a bit narrower. I’m not big on a neckline that sits out on my shoulders.
As far as color options, the previous iteration of this shirt had various designs, while this one only comes in solid colors. They have two grey options, a hi-viz yellow, and blue. Personally, I am a fan of the patterns, but this isn’t a huge deal either way.
An evening run on Sentinel Ridge wearing the Brooks Ghost t-shirt.
Function
In terms of function, a good running shirt is like a good cycling saddle: if you don’t notice it, that’s a very good sign. The hope is that it does its job and stays out of the way. In the case of a running shirt, especially one like the Ghost that is designed for warm-weather runs, the primary purpose is to wick sweat away from the body. I have owned the whole range of tech shirts in this respect: some that stay light an airy in spite of heat and humidity, some that will manage to soak up an inordinate amount of sweat and very quickly become heavy and uncomfortable. After running in the Ghost in a wide variety of conditions, I can confidently say that it is one of the most effective moisture-wicking shirts I have run in.
Additionally, the slightly loose fit and extremely light weight help in the comfort department. Overall, this shirt performs as well as any, and substantially better than most, when it comes to function while running.
Durability
Often, light weight and breathability can come at the expense of durability. Unfortunately, this shirt does not appear to be an exception. It held up fine for shorter runs, but once I tried wearing a vest over it for a 5-hour excursion in the heat, I started to notice some pilling and the fabric roughed up a bit around the seams. To be fair, I have not yet found a shirt that feels this light while running that holds up any better under a vest, but the search continues.
Also, a bit of advice from some real-world testing: if you have a cat with sharp claws, maybe avoid holding said cat while wearing this shirt.
So, here’s the gist of it The Brooks Ghost is a perfect shirt for warm-weather running, but I don’t recommend wearing it on runs that require a vest or pack. Treat it gently; if you must put it in the dryer, do so on low heat. At $40, it’s not particularly cheap, but on a hot day, it’s worth having a shirt that doesn’t become drenched after 20 minutes of running.
It was one of those endless August evenings. You know the kind, where the sunlight tricks you into thinking it’s 4 o’clock when in reality it is closer to 7, and you’re out on the trail and there is really no reason to go home and eat dinner at a reasonable hour. That can wait. There is singletrack to attend to. And there we were, out on a run in our local recreation area, fully appreciating the long, winding descent we had earned after a tough uphill effort.
Here’s the thing about those winding descents: you can’t see all that far in front of you. You turn a corner and before you know it, you’re face to face with an angry mama bear. Well it just so happens that on this particular evening, that is exactly what was waiting for us around one of those corners, several feet off the trail, with two cubs close by.
I have never made a habit of carrying bear spray when I am going on short runs or rides close to town for a couple reasons. For one, there is usually a fairly steady stream of people, so generally the bears will be somewhat desensitized to human presence. In addition, the bears you might run into close to town are almost exclusively black bears, which are very rarely aggressive.
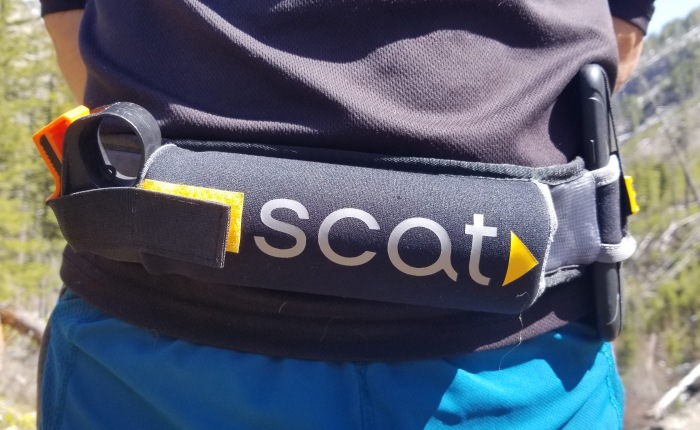
Mostly, though, I just don’t really like carrying bear spray, so in my mind I will justify not taking it however I can. I’d rather not carry anything in my hand when I’m running, and I’ll certainly avoid putting on a vest if I can get away with it. So what is to be done? That’s the problem the Scat Belt set out to solve.
Basically, this a belt that holds your bear spray so you don’t have to carry it. Simple enough. Of course, they do have two versions of the belt. The Griz (pictured above) includes a phone holster and a small accessory pocket. The Cub is the bare bones version that is designed to only carry bear spray.
In terms of overall comfort, this belt is not bad. I wouldn’t go so far as to say that I stopped noticing that I was wearing it, but it doesn’t bounce and the straps are effectively contoured and cushioned to avoid any discomfort. The ease of access is awesome. I like the idea of having my bear spray attached to my waist without having to worry about it jostling around. Pulling the canister out quickly, which I was a little worried about when I first saw the velcro strap design, turned out to be very easy.
I’m not sure about the phone holster design. It uses an elastic velcro strap, and if you have a phone that is particularly tall, you have to pull the strap very tight to secure it. Under that pressure, I am skeptical about the durability of both the elastic and the velcro. With smaller phones (under 5 inches), this will not be an issue. Still, I would be interested to see a system that places the phone horizontally, opposite the bear spray, instead of vertically next to it.
At first, I was interested in the prospect of using this belt while backpacking. In the past, I have always let my bear spray dangle from my hip belt. If I could have my phone handy for photos and my bear spray secured but easily accessible, that would be great. The Scat Belt is advertised as “fitting comfortably under any backpack,” but unfortunately, there is no way I could get it to work with mine, as my hip belt very much gets in the way. Alas, it looks like I will have to stick with my current system (although maybe this is just the excuse I need to upgrade my embarrassingly old, heavy backpack).
Where I see myself using the Scat Belt a lot is for longer backcountry run/hike days, in combination with a vest or hydration pack. Since it can carry my bear spray and phone, it frees up two vest pockets for more nutrition and hydration, and it is by far the most comfortable way I have found to carry bear spray while still keeping it accessible. In my preparations for the IMTUF 100 in September, I see myself doing a lot of those types of days this summer.
Fortunately, we didn’t end up needing the bear spray that we weren’t carrying on that beautiful August evening. By the time the mama bear crashed out onto the trail to give us a good talkin’ to, we had already passed her by. She stood up for a moment, but then glared disapprovingly at us and ambled back into the bushes. Perhaps, though, I will try to make a habit of bringing my bear spray along more often, at least when I am running alone.
Until recently, I have to admit I have never thought too much about the features of my running shorts. Basically, if they don’t fall down, chafe, or flop around heavily when I am trying to run, I’m generally good to go. As my runs have gotten longer, though, I have started paying a little more attention. In training for trail ultramarathons, things like carrying nutrition, adapting to varying weather conditions, and just being comfortable in general become very important. When you’re 15 miles out on some ridgeline, you can’t just stop in to the gas station to grab a snack and cool off/warm up.
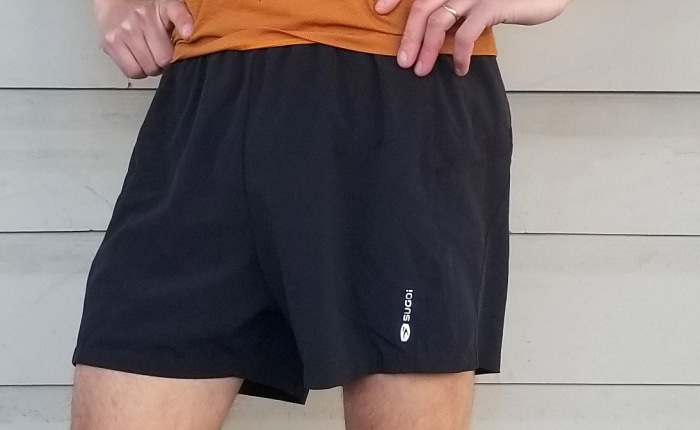
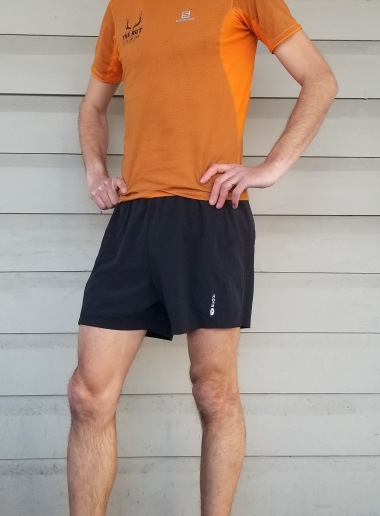
When it comes to general comfort, your first consideration is clothing. I recently tested out the Sugoi Titan running shorts to see how they stacked up, and I found some positives and some negatives as compared to other shorts I have tried.
The Sugoi Titan 5″ Shorts
The first thing I will mention is that the material of these shorts feels very light. While they fit a bit looser than I generally prefer, I didn’t notice any excess bulk. They felt surprisingly airy and, when I wore them to the local Tuesday night track workout with the intention of getting an idea how they feel while running fast, I completely forgot to pay attention after about two laps. That’s usually a good sign.
One of the features that is touted by Sugoi in these shorts is their “Icefil” technology. As much as I wanted this to just be little pockets that you fill with ice when you get too hot (brilliant marketing idea), it turns out that’s not what it is. Icefil is a specific type of fabric that is used on the inside layer at the front of the short. Anyone who has experienced chafing in that area on a hot day is aware of the importance of a particularly effective moisture-wicking material, and additionally, Icefil supposedly reacts with body heat to cool your skin temperature, leading to less sweat to begin with. I wish I could say I got a chance to put this feature to the test, but it turns out heat management hasn’t been much of an issue in the last few weeks in western Montana. I do look forward to trying it out in the summer, and I definitely plan on using these shorts when I pace the Missoula Marathon in July. If your goal is 3:20, follow me and I’ll get you to the Higgins bridge right on time!
Okay, so we’ve got general feel covered; now let’s talk storage. For running around in the mountains, vests and hydration packs are cool and all, but sometimes you just want to carry a handheld water bottle, a couple gels, and some Shot Blocks. For those days, shorts pockets are extremely important. Pocket configurations vary greatly from one to the next. Most shorts these days have a zipper pocket in the back, where it is least likely to feel off balance or bounce. Some also have small hip pockets, which I have grown very fond of for storing gels or other small, light foodstuffs. The small inside front pocket that used to be the standard on running shorts seems to have essentially gone extinct, for better or for worse.
The Titan shorts have only one pocket, and that is the rear zipper pocket. The most notable thing about this pocket is its size. By running short pocket standards, it is rather massive. Just for fun, I tried putting my Samsung Galaxy S8 in it, and I could still fit a pair of gloves and a couple gels. For the gloves and the gels, this pocket is great, but for me, the cell phone was too heavy for a pair of shorts this light and loose-fitting. I tried running a few strides, and the bouncing annoyed me right away. However, I will say if I were going for a short hike on a hot day, I would have no problem with it. In the spring weather, I have made good use of the pocket, storing a buff, gloves, etc. as the weather changes during a run.
Features are great, but when it comes down to it, the true test of a good pair of running shorts is whether you notice them when you are running. If not, it’s probably a well-designed pair of shorts. So far, the Sugoi Titan 5″ shorts certainly pass that test.
If you know me very well, you know that one of my favorite races every year is The Rut Mountain Runs at Big Sky Resort. And if you have ever participated in The Rut, you probably have an idea why I like it so much. The descents are steep, the climbs are steeper, and the course is littered with rocks, rocks, and more rocks. I have seen more than one pair of shoes left in tatters after a trip up and down Headwaters Ridge and Lone Peak.
As a result, one of my main questions I ask myself when trying out a new pair of shoes is: How would this do on The Rut course? After some testing on varied terrain, I can say with confidence that the Asics Gecko XT passes the test and more.
To start, let’s discuss the main feature that defines the Gecko. As you might have guessed from the name, the sole is inordinately grippy.
The sole of the Gecko XT.
The aggressive lugs in the middle of the sole work to reduce any slippage that you might encounter when the climbing gets steep, and the compound they use seems to pretty much stick to anything. Probably the most impressive performance is on wet rock. Where many other shoes would slip, this one stays surprisingly grounded. This is useful for pushing off when climbing and for cornering on rocky descents.
Some trail shoes do a very good job of seamlessly moving between trail and road, and can fairly comfortably be used for both. This is not one of them. It makes a horrendous racket on the road and doesn’t feel remotely smooth. Luckily, that’s okay because it’s not what the shoe is made for, but be forewarned in case you find yourself running some road miles to get to the trail. Once there, though, it is immediately at home on technical terrain.
Testing the Gecko on the slickrock while on vacation in Sedona. Photo credit: Kailee Carnes
The Gecko is pretty average among trail shoes as far as weight is concerned (the advertised weight for the men’s shoe is 10.2 ounces). For those looking for a particularly light weight shoe, that does seem to be a bit on the heavy side, but if the extra grip means less slippage and resulting lost potential when climbing, the weight penalty may be worth it, particularly when you take into account that it provides substantial stability and security when descending.
I will also say that this shoe has an extremely effective rock plate. I got a chance to do some hard descending on sufficiently rocky desert trails, and either I made zero mistakes (not likely) or the shoes have a superb ability to soak up any blows from sharp rocks.
The durability, while yet to be determined definitively, is looking promising. In my experience, good grip often comes from soft lugs, and soft lugs can get ripped up quite easily. After the aforementioned rocky trails, I took the photo of the sole of the shoe above. The lugs appear to be holding up quite nicely. Time will tell, and if you are curious about this shoe, feel free to ask me about it in a month or two, because chances are I will find more opportunities to beat it up in that time.
The final takeaway: if you like technical, rocky trails, this shoe is definitely worth a try. If you run a lot of roads and hit the occasional flowy singletrack, you might look elsewhere.
If you have been around the trails in Missoula (or any similar town) on a weekend afternoon, you are aware that there are a whole lot of folks out there who like to run or hike with their dogs. In fact, I’d say the odds are pretty good that you’re one of them. If not, you might not get a whole lot out of this post, except for a chance to get in on the conversation next time all your “dog-parent” friends are talking about taking their canine companions out adventuring.
Here’s the thing: it’s not just one type of person who owns a dog, and it’s not just one type of dog who’s out there in need of exercise. And like it or not, all those dogs sometimes need to be on a leash, whether it’s because of rules, trail etiquette, or just common sense. What you may not realize, though, is that there are a variety of options out there to match the specific leash needs of whatever human/dog combo you happen to be a part of.
Since my 10 year-old husky, Kava, is not particularly suited to high-mileage summer running (fur is a problem when it’s 90 degrees out), this time of year is when she gets out a lot. We are currently getting ready for the Snow Joke Half Marathon, which will take place February 24th, so I have been trying to get her out somewhat regularly in preparation.
For years, I have used the Ruffwear Roamer leash, which I like for the most part, with one specific complaint: it is bulky. For runs where I am keeping my dog on the leash the whole time, it is great because of the waist belt and the elastic webbing that allows for a little movement without having too long of a leash that flops around when the dog is close. However, if I get to a trail where she can run free, I have to wrap it around my waist twice and buckle it to itself, which means I am wearing a giant, heavy belt, which really cramps my style when I am trying to crush all the KOM’s on Waterworks, er, um, I mean, go for a nice pleasant jog. Until recently, I have always dealt with it, but only because it was what I had.
Then I tried the Rad Dog Release N Run leash. Now, I don’t want to give the impression that this leash is the answer to all the problems I have ever had with dog leashes, but it does solve some issues.
Running with the Rad Dog leash on the Kim Williams Trail. Gotta get those road miles in for Snow Joke!
The feature that really gives the Release N Run leash an edge is that it retracts into a collar when not in use. As you can see in the photo, the leash itself it a lightweight cord with a handle made of nylon webbing. The whole collar, including the leash, weighs in at 4.7 ounces. Kava hasn’t complained about the difference between that and her standard collar, which comes in at 3 ounces. Not that she complains about anything when she gets to go for a run. By comparison, the Ruffwear leash is a bit of a tank at just over 9 ounces.
When the off-leash area is reached and it’s time for some freedom, there’s no fiddling or situating, I just let go of the handle and we’re ready to go.
Modeling the Rad Dog leash (in full collar mode) on top of Mount Sentinel. Freedom!
Another big advantage of this system is evident when it’s time to leash up again. Once again, no fiddling or situating; just grab the handle and you’ve got a fully leashed dog once again. This makes it very easy to alternate between on and off-leash sections, like if you have a short road section between trails, or vice versa.
I think the pros of this collar/leash are obvious if you are on and off trails a lot. Really the only downfall that I have run into is the length of the leash itself. It is advertised as being a 4-foot cord, but the 4 feet is measured from the end of the handle to the far end of the collar. As I found, the distance from your hand to the dog’s neck at full extension is actually about 3 feet, 2 inches, which I think is a little short for a rambunctious dog. At first, this was annoying, but to be honest, Kava has been getting more used to it the more we run with it, and now she tends to stay right next to me when I have her on the leash, and since I am not particularly tall and she is not particularly short, it hasn’t been much of an issue. I will say though, generally if I have her on this leash, I am only keeping her on the leash for a short part of the run, until we get to a point where she can be set loose. Personally, I’d rather not carry something in my hand, so if we are headed out for a road run where she is going to have to be leashed the whole time, I will go for the one with the waist belt.
All in all, I think most people would end up liking this leash a lot. There are a few situations you might want to avoid it:
– If you only run on roads with traffic, and your dog needs to be leashed the whole time, or over about 80% of the time, the short length may get annoying.
– If your dog needs to be leashed all the time due to aggression, a particularly, um, adventurous spirit, or otherwise, once again I would opt for something a little longer, or with a waist belt.
– If you are 6’4″ and you like to go running with your dachshund, first of all, it will make my day if I see you out running. Second of all, do yourself a favor and get the longest leash you can find. That is not this one. Seriously though, I hope there is someone out there who fits that description.
Personally, I’d say I end up reaching for the Rad Dog leash about 80% of the time. For the Snow Joke Half at the end of the month? I think I will stick with the Ruffwear leash for that, simply because she has to be leashed the whole time.
Hi everyone! It’s New Years Day, and this time of year, it’s cold outside. I don’t know if you have all realized that. Sometimes you can pretend it’s not, but it still is. The last couple days, the sun came out and warmed everything up to a nice, toasty 30 degrees. It might as well have been summer. I saw people out shoveling their sidewalks in shorts. No joke.
But really, we need to all accept that for the next couple months, everyone except the UPS delivery drivers will be layering up pretty much every day. For outdoor physical activity, that makes things quite complicated. You’re always looking for something that will keep the water and melting snow out, but will let sweat pass through so you don’t get drenched from the inside. Something that will keep the wind from chilling you to the bone, but won’t make you feel like your whole body is suffocating. That perfect amount of insulation that keeps you from wasting all your energy shivering, but at the same time allows you to move freely.
The quest to achieve these things is one that never ends. Some days, by stroke of luck or careful planning, you get it just right. Those days are great. Other days fall short in one way or another, and you aim to fix that on your next outing. The good thing is, there are certain clothing items that offer a degree of versatility that can greatly increase your chances of the former. Be it a favorite wind jacket, pair of gloves, or a simple buff, everyone has those items that they reach for more days than not once the weather turns chilly.
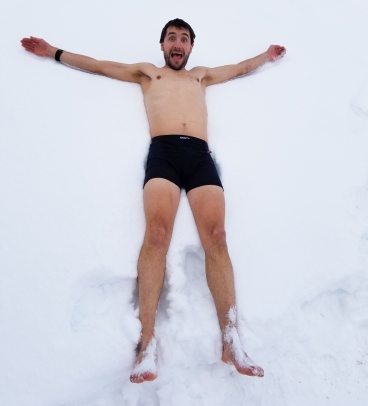
For me, the newest addition to that list is the Active Windstopper Gunde short from Craft. I have put this wind-proof underwear to the test in temperatures ranging from 0F to 32F, both skiing and running, under shorts, tights, and ski pants, and have been extremely impressed with the variety of situations in which they are comfortable.
I cannot recommend these underwear for making snow angels. Not enough insulation.
In all seriousness, I did my best to find something negative to say about these things. I thought maybe when temperatures got above 25 or 30, they might get too hot, or that they wouldn’t wick sweat that well, or that the support wouldn’t be that great. One by one, though, they ticked off all the boxes.
Under-dressing in the nether regions is definitely not something you ever want to do, and if you’re like me, your legs don’t generally have a problem warming up quickly. Therefore, I would recommend that everyone go out and get themselves a pair (or several) of Windstopper underwear. Most years, there isn’t a day from November through February where you would regret wearing them. Will you absolutely need them all of those days? Probably not, but I will be reaching for them anytime there are borderline conditions from here on out.
So there we all were, enjoying a nice fall. The leaves were making their lazy journey from their high perches down to the ground below, where we would put off raking them until the very last minute, under the guise of there being fewer left to fall after said raking was done, but really just because we are lazy and like to procrastinate. there was a nice coat of larch needles on all the trails around town, still just enough light in the mornings and evenings I didn’t yet have to ride my bike in the dark, at least not every day. A nice coat of snow covered everything just in time for the Elk Ramble 15k, and we all got to trudge around in the snowiest race of the year. We all thought it was winter then, but fall came back.
As November wore on, though, it wasn’t the cold or the snow that drove home the point that winter is quickly on its way. No, the real, consistent proof of that fact, the part that never changes from year to year depending on the current season’s weather patterns, is the darkness. Soon, it will just barely be light when I leave for work in the morning, and it has already been dark for a solid hour when I go home in the evening.
All this is to say, if I want to keep running through the winter, and I do, a good bit of it will be happening in the dark. And that brings me to my main point: lights!
I have always been a headlamp kind of guy in the past. They have the advantage of increasing the visibility of the runner while also allowing you to see that rock or curb quickly approaching. As a side note, they by no means guarantee that you won’t trip over that curb. It’s possible that a certain unnamed individual did a faceplant after tripping over a snow-covered curb doing intervals in the dark in Greenough Park last winter. It’s also possible that individual was me. Not saying one way or the other for sure.
Headlamps have their downfalls, though. The most obvious: vehicle drivers can’t see them from behind. Also, many people find them uncomfortable. This necessitates a search for other lighting options. The most recent one I tried out and am reviewing today is an arm band. Specifically, the Nathan Lightbender RX.
I had never used an arm band before, and my first thought was that I would prefer something that wrapped around the arm more snugly. The Lightbender essentially forms kind of a D-shaped loop, and, at least if you have little chicken arms like me, it fits fairly loosely, even when tightened down all the way. While I was worried this would bounce around an be obnoxious, it turned out to not be that big of a deal. It did work its way down to my elbow as I ran instead of staying up higher, but it was still comfortable and didn’t feel like it was flopping around all over the place.
The unique (and fun) feature of the Lightbender RX is that you can change the color of the light. There are three options (red, green, blue), so you can pick whichever one suits your mood that day, or you can really geek out and try to research which color is the most visible to passing motorists. The internet has less to say about this than I thought it might, but the overall consensus seems to be somewhere between green and yellow. Since yellow isn’t one of the choices, one might choose green. Then again, green means go, so perhaps red would instill more caution in drivers. Or, maybe you don’t want to blend with a sea of traffic lights, so you choose blue to stand out a bit more. As you may have gathered, there is no right or wrong choice, and that’s why there are three of them.
The method of changing the light color was not immediately intuitive for me, and the instructions didn’t help. They said to turn on the light, then double tap the power button, but what they really meant was, turn on the light and then hit the button again right after the light turns on. Maybe I’m crazy, but to me that means two different things. Anyway, I eventually figured it out and happily flipped my way through the color options.
One last factor with any kind of light that is worth paying attention to is battery life. Nathan advertised the battery life as 8 hours on steady mode or 16 hours flashing. I would definitely encourage any user to pay attention to how long it’s been since the light was last charged, because like fall turning to winter, waning battery power is a gradual process. If you’re not careful, before you know it, you’ll be in the dark.